When determining what kind of fixing service to use, people often take the age of the bathroom as a factor. Homeowners who have old bathrooms usually go for a temporary fix for their leaky shower floor. They might also decide to do a quick fix, especially if they will soon need to fully renovate their bathroom. They want to merely fix the leak, for now, to avoid structural problems from arising.
However, new homeowners would seek out a more permanent fix for their leaking shower floor. After all, they just built their house, so they would want to avoid doing a costly renovation too soon. By applying a permanent fix, they can prevent structural damage, stains on the ceiling below the bathroom, and carpet mold.
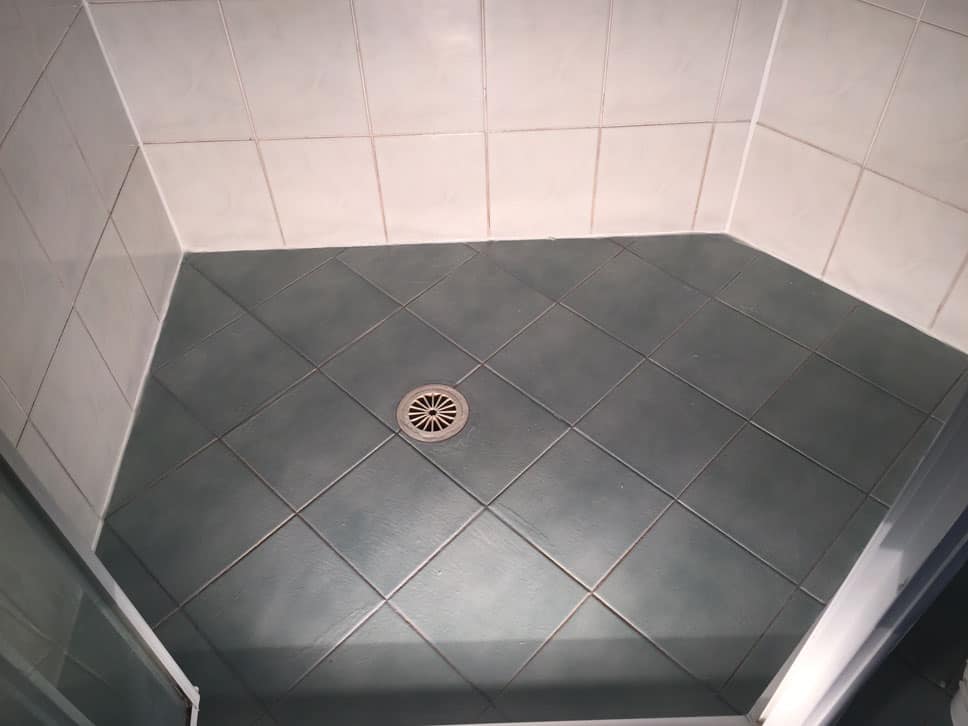
What Causes a Shower Floor to Leak?
Movement of the home accounts for over 90% of failures for shower floors. The following situations can also cause leaks in your shower:
- Incorrect waterproofing product installed in your shower
- No waterproofing product present on your shower floor
- Correct waterproofing product but was damaged during the installation of floor tiles
- Correct waterproofing product but installed incorrectly or in the wrong spot
The reasons presented above are those that might have occurred during the installation process. These issues become immediately apparent. However, if you experience leakage after around 2 years of the shower being installed, then it might be because your waterproofing sheet already formed some stains and cracks. The formation of those cracks is typically caused by the movements in and of your home.
Despite building using materials to prevent houses from forming cracks in case movements and shakes happen, construction companies often use very rigid materials, like sand and cement bed/screed, to build the shower base. Sometimes, they also use thick cement sheets for the shower floor with the expectation that it will not crack over time.
Because the construction used rigid flooring, however, cracks will form quicker than expected. If we are to make an analogy, using rigid flooring is the same as having inflexible skin or muscle over our bones. The surface is simply not practical for movements; that’s why cracks are inevitable.
Another situation that can increase the chances of shower floor leakage to happen if the installation of stone tiles in your shower. Stone tiles behave like rigid sponges that soak up a large amount of water, holding it in before discharging the moisture all at once. Because it holds moisture, a percentage of the water will not reach the drain. This will then cause leakage, leading to rots and structural damage to the home.
Moreover, the biggest issue that leads to a leaky shower floor is having your house built with a frame. Although most people immediately consider timber frames for their home, those and other frames that do not include a solid concrete slab can cause leakage to your shower pan. Frames that have a thinner width fail because they react to movement excessively. For example, the impact of heavy rain and drought can easily create movement in the foundations of your home. These movements affect every area in your house, which includes your shower room.
The reasons above have existed ever since that insurance companies recommend upcoming homeowners to keep their eyes on flawed constructions. A Home Insurer advised the following case study:
Case Study: In a recent scenario, a home that was built five years before the incident had a shower floor waterproofing failure. Due to the faulty construction that caused the damage, more than $240,000 was spent for the repair, which was almost the same amount of the original building cost.
Furthermore, there really is no need for homeowners and construction companies to fight over the issues regarding potential causes of the shower floor leakage and whose fault it is. After all, pushing the matter into a legal process can be costly and lengthy for both parties. More importantly, though, it adds stress to your family.
Fixing your shower floor might serve as an easier route for you. Fortunately, we prepared a guide below on how to a shower floor that’s leaking.
How Do You Fix a Shower Floor That’s Leaking?
So, how do you repair a leaky shower floor? First, download this step-by-step instructional manual, which includes video references: https://www.remedialmembranes.com/leaky-shower-repair/
This can only be accessed by logging into the website.
To briefly summarize, simply remove existing caulk/silicone first. Afterward, clean the shower with chlorines and rinse the area thoroughly. Next, you should identify the conditions of your tiles. Knowing the conditions of your tiles can help you determine what kind of fix you should need for your shower.
If the tiles you used are still in good condition, then you might only need to replace any missing grout.
However, if the tiles are in bad condition, especially when they are loose already, then you should remove the tiles and any existing adhesive from the floor. After removing the tiles, inspect the surface if it looks spongy. If it is, then the surface may have already been damaged by water and might require a more extensive repair. Usually, though, it can easily be dried out with a heater, and after removing the moisture you can now replace the tiles.
We recommend you to use SMX Caulk as it is an all-around adhesive while showing great performance as a sealant. The SMX Caulk is a neutral cure and does not need open air to cure. It may be necessary to wait for 24 hours, though, for it to cure properly. After the curing process, you can then re-grout the tiles immediately to have another layer of sealant.
Once the grout has properly cured as recommended on the packaging, you can now manually dry out the show floor to remove excess water. You can do this by putting a heater on the leaking shower floor and leaving it there overnight. Make sure, however, that the electrical wiring is positioned away from the heater to prevent it from heating up and causing a fire. When morning comes, turn off the heater and let the surface cool down.
Afterward, you can now install Clear Waterproofing Membrane over your tiles. First, apply the caulk to the junctions where your floor meets the wall and where the wall meets the surface extending above the shower rose/head. Then, mix up the Clear Waterproofing Membrane Solution Part 1 to Part 2. Next, you should apply the membrane from the grout joints on the walls down to the shower waste.
For the finish of your application, you can decide on what kind of tile surface you want your shower to have. After all, the Clear Waterproofing Membrane can provide at least three types of finishes: gloss, matte, and satin.
To achieve a gloss finish, you can mix the Clear Waterproofing Membrane Solution Part 1 and Part 2, as you did in the first coat. You should also mix in the aggregate to make sure that the surface will be slip-resistant despite the glossiness. Moreover, if you want a matte finish, you should use Part 1 and leave out Part 2. Mix Part 1 with 5% matting paste and apply it to your tiles for the matte finish. The satin requires almost the same procedure. However, you will only need 2.5% matting paste to attain that kind of finish.
After applying the mix, you can now let it dry or put the heater back again to the surface to quicken up the pace. With all those procedures done, the once leaky shower floor is now watertight, so it should no longer exhibit any signs of leakage.
What Are the Costs Associated With Traditional Leak Repairs?
When a shower pan leaks but there are no matching tiles present for the repair (unless the homeowner has kept some), then your bathroom might require a full renovation. However, these full renovations usually cost around $20-30k.
If that is not cost-effective for you, then the plans usually presented by homeowners are not either. After all, they often suggest ripping out the bathroom and the shower tiles, its waterproofing layer, and sand or cement screed. It usually results in a mess with the final product looking worse, since it looks like they simply patched in the tiles. Its appearance will only remind you of the fact that your shower pan once leaked.
Fortunately, however, you can easily fix these shower floor leaks by applying Clear Waterproofing Membrane over your tiles. This product only cost $135.40 and is already a long-term or even a permanent fix for your leaks. By using this Clear Waterproofing Membrane, you can fix your leaky shower floor yourself without having to change its appearance. Also, you can fix the leak with it in a single day.
That makes the usage of a Clear Waterproofing Membrane over your tiles more cost-effective.
How Remedial Waterproofing Can Help
Clear Waterproofing Membrane is a two-part aliphatic polyurethane waterproofing layer. Aliphatic simply means that you can leave the membrane exposed to the environment and that you can walk on it without degrading its quality. Moreover, polyurethane remains recognized as one of the best waterproofing materials in the world.
The difference between our membrane and other polyurethane sheets is that our Clear Waterproofing Membrane is an over-tile installation. This means that you only need to secure the gaps between the tiles, and it will be ready to install already. Moreover, our membranes offer three different finish options: Gloss, Satin, and Matte.
Furthermore, our waterproofing membrane, as its name suggests, is clear. Because of that, you can apply it to your shower tile without changing its appearance at all. You can match its finish to the existing finish of your tiles and apply the membrane from one grout joint to another. That will make it harder to see where the application begins and ends.
Although we don’t claim that the Clear Over-Tile Waterproofing Membrane is invisible, without the knowledge of its application, it will be hard to notice and differentiate it from naked tiling.
Lastly, our waterproofing membrane comes with aggregate to make the surface slip-resistant. With that, your shower can be safely used by anyone in the family, may it be toddlers or the elderlies, as they will not easily slip despite the moisture on the floor.
It is no longer a stressful process to repair your leaky shower floor. The clear over-tile waterproofing membrane can repair it in one day and is simple enough to DIY.